Attack Strategy
As a striker, the robot actively chases the ball and tries to score into the goal. We will be explaining the ball following and goal scoring strategies separately.
Ball Chasing
Being able to chase down the ball is the most crucial part of any soccer robot. In our case, having a front and back catchment area means different algorithms must be used depending on which catchment area we are using.
Front Catchment
To catch the ball in the front catchment area, it is not sufficient to just move towards the ball, the robot must also find the path that orbits it around the ball such that it ends up behind the ball.
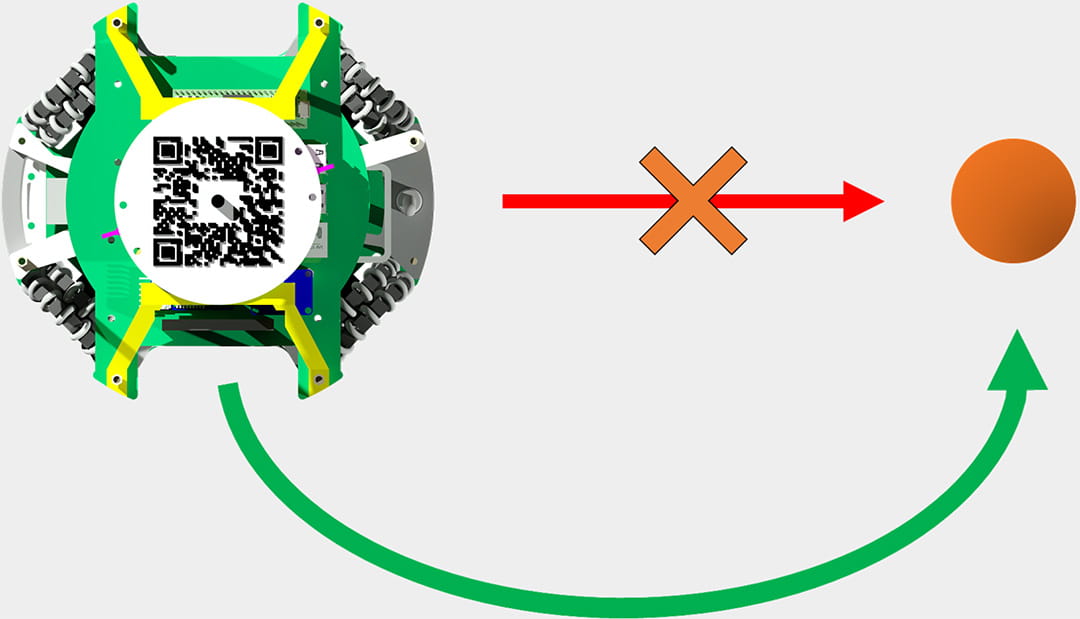
We will be explaining how we achieve such motion intuitively first, before jumping into the math behind it.
Basic Principles
Principle 1: The greater the ball angle (from the front of the robot), the more the robot needs to deviate from the ball in order to go around it.
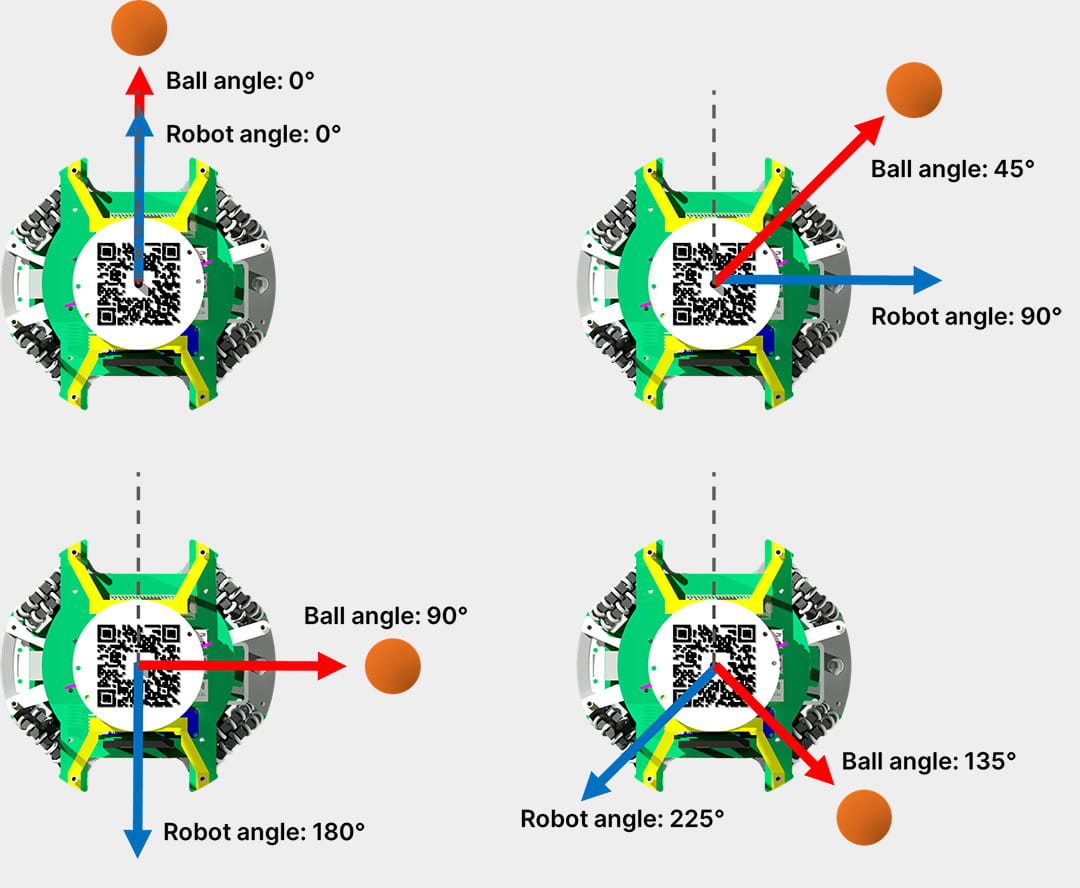
For the first principle, we’re concerned with the ball’s angle only. From the diagram above, this principle should be self-explanatory: As the ball’s angle increases, it is getting “further away” from the front, which means the robot must deviate further from the ball in order to move around the ball. Do note that the maximum offset angle is typically capped at 90°, or the robot runs the risk of moving away from the robot instead of around it (e.g. think about ball angle at 180°).
Principle 2: As the ball distance increases, the robot’s angle deviation should decrease
If the robot’s offset angle varies only by the ball’s angle, it could create an inefficient path when the ball is far away, as shown below:
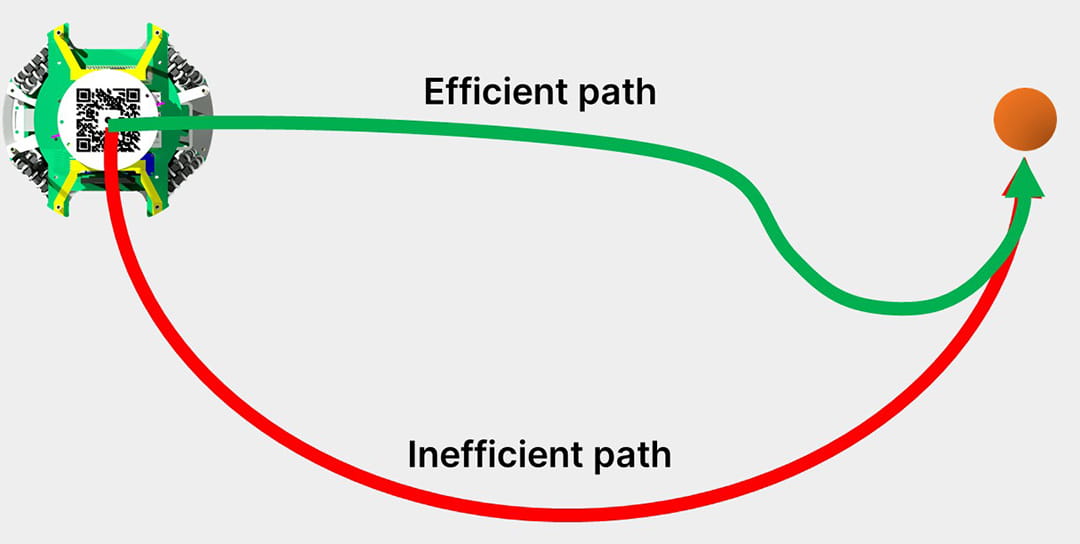
When the ball is further away, the robot can afford to have a smaller offset angle as its main objective becomes reaching the ball as fast as possible, not necessarily going around it.
Mathematical Approach
The overall equation is simply:
where R is the robot’s bearing, B is the ball’s bearing, O is the offset angle (which varies positively with the ball’s angle), and m is the offset multiplier (which varies inversely with the ball’s distance).
Firstly, for the offset angle, we opted for a simple direct proportionality relationship with B:
where n is a constant. The reason it is a piecewise function is because if the ball is on the left side (0° to 180° the robot needs to orbit around from the right i.e. anti-clockwise, while if the ball is on the right 180° to 360°, th erobot needs to orbit fromt he left i.e. clockwise). As mentioned ealier, the total offset angle is always capped at a magnitude of 90°. Below is the graph of the above function, which might make it easier to visually understand.
As for the multiplier M, it varies in a negative exponential relationship with the ball’s distance. The relevant equations are:
where D is the ball’s distance (in cm), c is a constant that typically represents the maximum ball distance, such that f is a variable measuring how “close” the ball is. The values a and b are constants which can be tuned to change the robot’s ball chasing characteristics.
In the graph below, the red line represents the equation above with arbitrary constants for a, b and c. By increasing a, the graph transforms into the blue and black lines, while increasing b transforms it into the green and purple lines. As shown, by modifying both constants, an ideal response curve can be generated, which would allow the robot to quickly increase its offset angle as it gets closer to the ball, while preventing its arc path from being too large. Tuning this curve is the difficult part of getting good ball chasing movements.
Robot Orientation
When doing front ball chasing, we have the option of either orientating towards the goal or simply facing straight forward. Whilst in theory, facing the goal sounds like a better idea, after much testing with our specific robot, we found facing straight forward to be more feasible.
-
Our robot already has a good enough dribbler that allows it to move in all directions while keeping control of the ball. Hence, after catching the ball, the robot can simply manoeuvre its way to the goal, without tilting towards it.
-
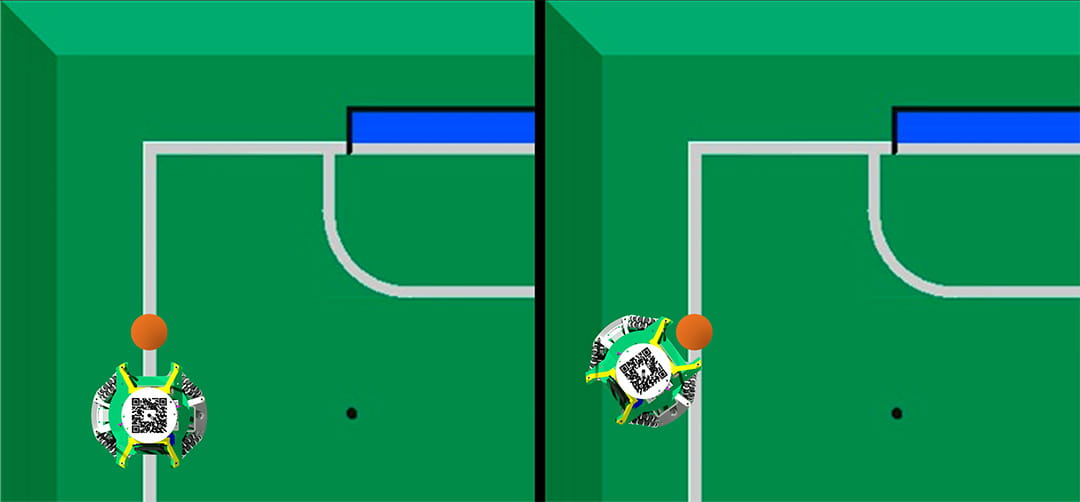
When facing the goal, especially at larger tilts, the robot has to leave the field more in order to catch the ball, as shown in the diagram below.
Back Catchment
The benefit of using the back dribbler when the ball is behind the robot is that it allows for the ball to be caught much faster, since the robot doesn’t have to orbit around the ball and catch it in the front. In addition, the opponent robot would not be able to see the ball when its dribbled in the back, giving it less time to react to the ball.
However, since scoring with a “back dribbler flick” is less reliable, we only trigger the condition for it when the ball is in a small angle range of ± 15° from the back.
Since the range of angles is small, the back ball chasing algorithm is simply to move exactly in the direction of the ball, while applying an angular velocity that is proportional to the ball angle, allowing the robot to turn to face the ball.
Goal Aiming
While being able to capture the ball is important, to ultimately win, the robot must be able to convert possession into actual goals scored. With a strong dribbler which allows our robot to manoeuvre in all directions while keeping possession of the ball, extra strategies should be implemented to deal with how the robot should move with the ball and score goals.
Note that for all goal scoring, the robot always orientates itself to face straight forward.
Front Scoring
The robot uses a similar equation to that of ball chasing i.e. adding an offset angle to the goal angle to orbit its way to face the goal. For goal tracking however, we went with a constant offset multiplier as we wanted the robot to take a big orbit path, regardless of its distance to the goal, such that it has more space to position itself before shooting. Hence, the equations for goal tracking is simply:
where G is the goal’s bearing, OG is the offset angle for goal tracking, and MG is a constant multiplier.
The solenoid kick condition is triggered when the robot is less than a specifc distance away from the goal and its current robot angle is in the general forwards direction.
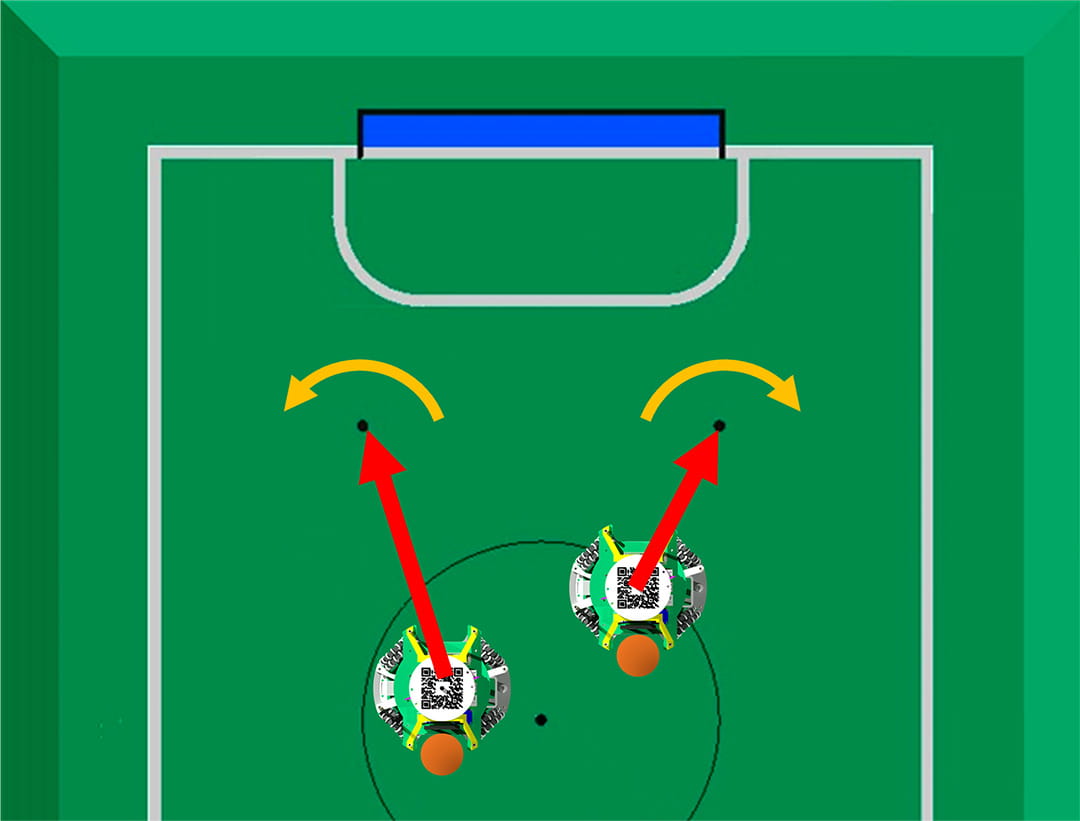
Back Scoring
If the ball is in the back, the robot moves to 1 of the 2 neutral points in front of the opponent’s goal, based on which one is closer to itself. Once it is within range of the neutral point, it would spin on the spot, either left or right depending on whether it’s on the right or left neutral point respectively, which flicks the ball out of the back catchment area and hopefully its backspin is sufficient to carry it into the goal.
As for the positioning of the robot when the goal is blocked, due to the movement towards the neutral points being based on the camera detecting the goals (see Localisation), it would naturally move more towards the left or right depending on which area of the goal is blocked.
In the diagram below, the light blue arrows show the vectors to the actual centre of the blue goal and the actual left neutral point. However, as the blue goal is partly blocked by the opponent robot, the perceived centre of the blue goal and perceived neutral point will be shifted left, represented by the orange vectors. This “automatic” shift to the left gives more space for the ball to be flicked from the right, increasing the chances of scoring.

Waiting Position
When the robot detects that the ball is not in the field after some time has passed, it returns to its default position, which is located about 25 cm behind the centre of the field. To find out how it is able to move to specific points on the field, see Localisation.
UPDATE TO SPECIFIC HEADER
Staying In-bounds
To stay within boundaries as a striker, we employ a few strategies.
- The further the robot’s distance from the field centre, the slower the robot’s speed. This is a somewhat suitable compromise as the extreme corners and sides of the field are far from the goal, so the slower movement would not produce too big of a disadvantage. However, if we are able to further refine our staying within bounds techniques, we would definitely remove this speed clamp as having a very fast robot is crucial at the highest levels in the international competition.
- When the robot first hits the line, we will check its present speed. If it is very high, we will perfom a line avoidance, which is where it moves perpendicularly away from the line, inwards into the field (essentially rejecting the line).
- If the robot is moving slowly, we will perform line tracking instead, where the robot follows the line until it is as close to the ball as possible.
For more information on strategies 2 and 3, check out Line Control.
Striker Video
UPDATE TO BETTER VID